How to Master Multiple Exposures
1 11 Share TweetMultiple Exposures are one of the key skills in any good Lomographer's toolkit. They’re easy enough to make but not so easy to master.
If you’re new to the concept of multiple exposures, it’s pretty much as simple as it sounds. Multiple exposures (MX) are photographs in which two or more images are superimposed in a single frame. The same frame is repeatedly exposed to the light. This means that each subject you shoot will be layered upon the previous subjects.
It is possible to take multiple exposures using any analogue camera, but using a camera with a built in MX function makes it a whole lot easier. Most Lomography cameras have easy to use MX buttons or switches, including the LomoApparat, Lomo LC-A+, Fisheye No.2, La Sardina, Diana family, as well as all our Instant Cameras.
Let’s take a look at some tricks to help you perfect this essential Lomographic technique.


Try to avoid overexposure
When shooting multiple exposures you will be exposing the film to more light than normal. For this reason it’s always a good idea to go down an f stop or two on your camera to avoid overexposure. How many f stops to go down will depend on how many exposures you’re taking. Essentially the aim is to underexpose enough so that the final image will have the correct exposure, and the highlights won’t be blown out.
However, most film handles overexposure very well, so don’t worry, even if you shoot on a camera where you can’t easily adjust aperture or ISO you still have a good chance of achieving great results.


Plan your Composition
When it comes to composition some photographers like to carefully choose the subject of their multiple exposure. If this is your style it may also be a good idea to shoot the two exposures in the same session so you have a clear idea of how the final image will turn out.
It can also be a good idea to keep things minimal when taking multiple exposures. If all your layers are full of details you may end up with a final image that is cluttered and confusing.


Making silhouettes is one of the most popular compositions for multiple exposures, and for a good reason: when they’re done well the results are incredible. They’re also relatively easy to visualize, with very obvious areas of dark and light, which make them a good idea for those just starting to get to grips with MX.
To create a silhouette you will need to capture your subject against the light (with a bright background.) Then shoot your second exposure over the top of the first to fill up the dark silhouette with interesting colors and textures. Remember that anything bright will destroy information and anything dark will maintain information for the next exposure.
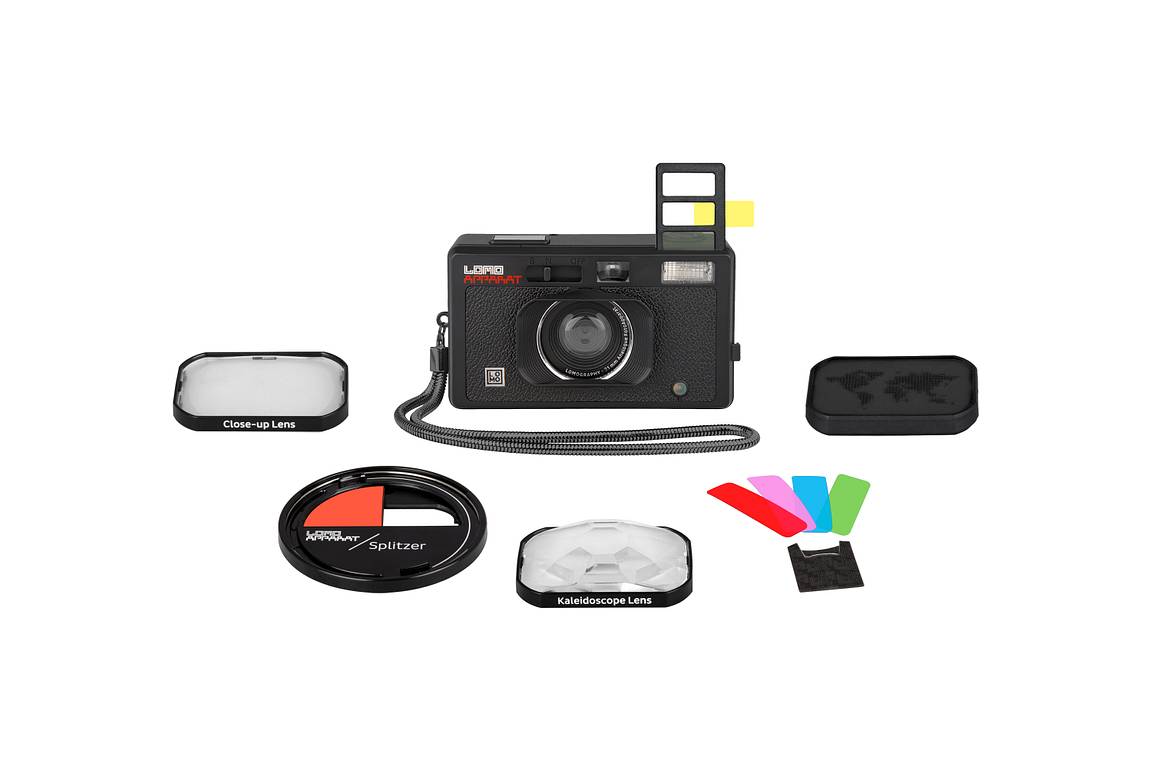
Use a Splitzer
This Lomo accessory allows you to slice up your frame and control which parts get exposed, so you can create even more imaginative multiple exposures. Simply twist the Splitzer’s blades to decide exactly what appears in your photo. Take a shot, twist the blades again and take another. Using the splitzer you can slice up your photos into halves or even quarters.


Have fun!
In the end the most important thing is always to enjoy yourself and not think too much about what you should or should not be doing. It’s an incredible feeling to create an effect like this entirely in camera, so experiment and find your own way of creating images you love!


Don’t forget to share your imaginative multiple exposures with us here on your LomoHomes, we love to see them!
written by alexgray on 2022-12-06 #tutorials #experimental #multiple-exposure #tipster #double-exposure


One Comment