Some Tips on Going Redscale

18

If you love a limited color palette and shades of red, you've likely already discovered redscale film. Despite a simple concept, the range of achievable results with this inexpensive film is huge. Read on for a few simple tips!

Limiting the tones in your photos is a great way to shift the focus. It's one of the best things about shooting black and white. However, redscale film is a delicious alternative to old fashioned monochrome -- you get all the advantage of a limited palette but you also get that added pop of color. Combine this with a flexible and easily controlled way to adjust color tones + cheap price, and it's no wonder that Lomo and redscale go so well together.

Credits: russheath

Tip #1: Mind the Exposure

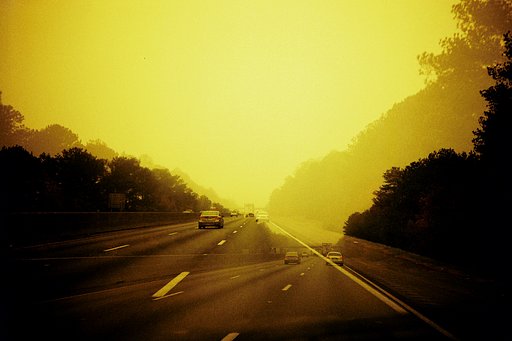
Increased exposure = decreased intensity. Consider the exposure of your redscale film to be a "volume knob" of sorts. Want to crank up those reds? Then underexpose a little.

Credits: russheath

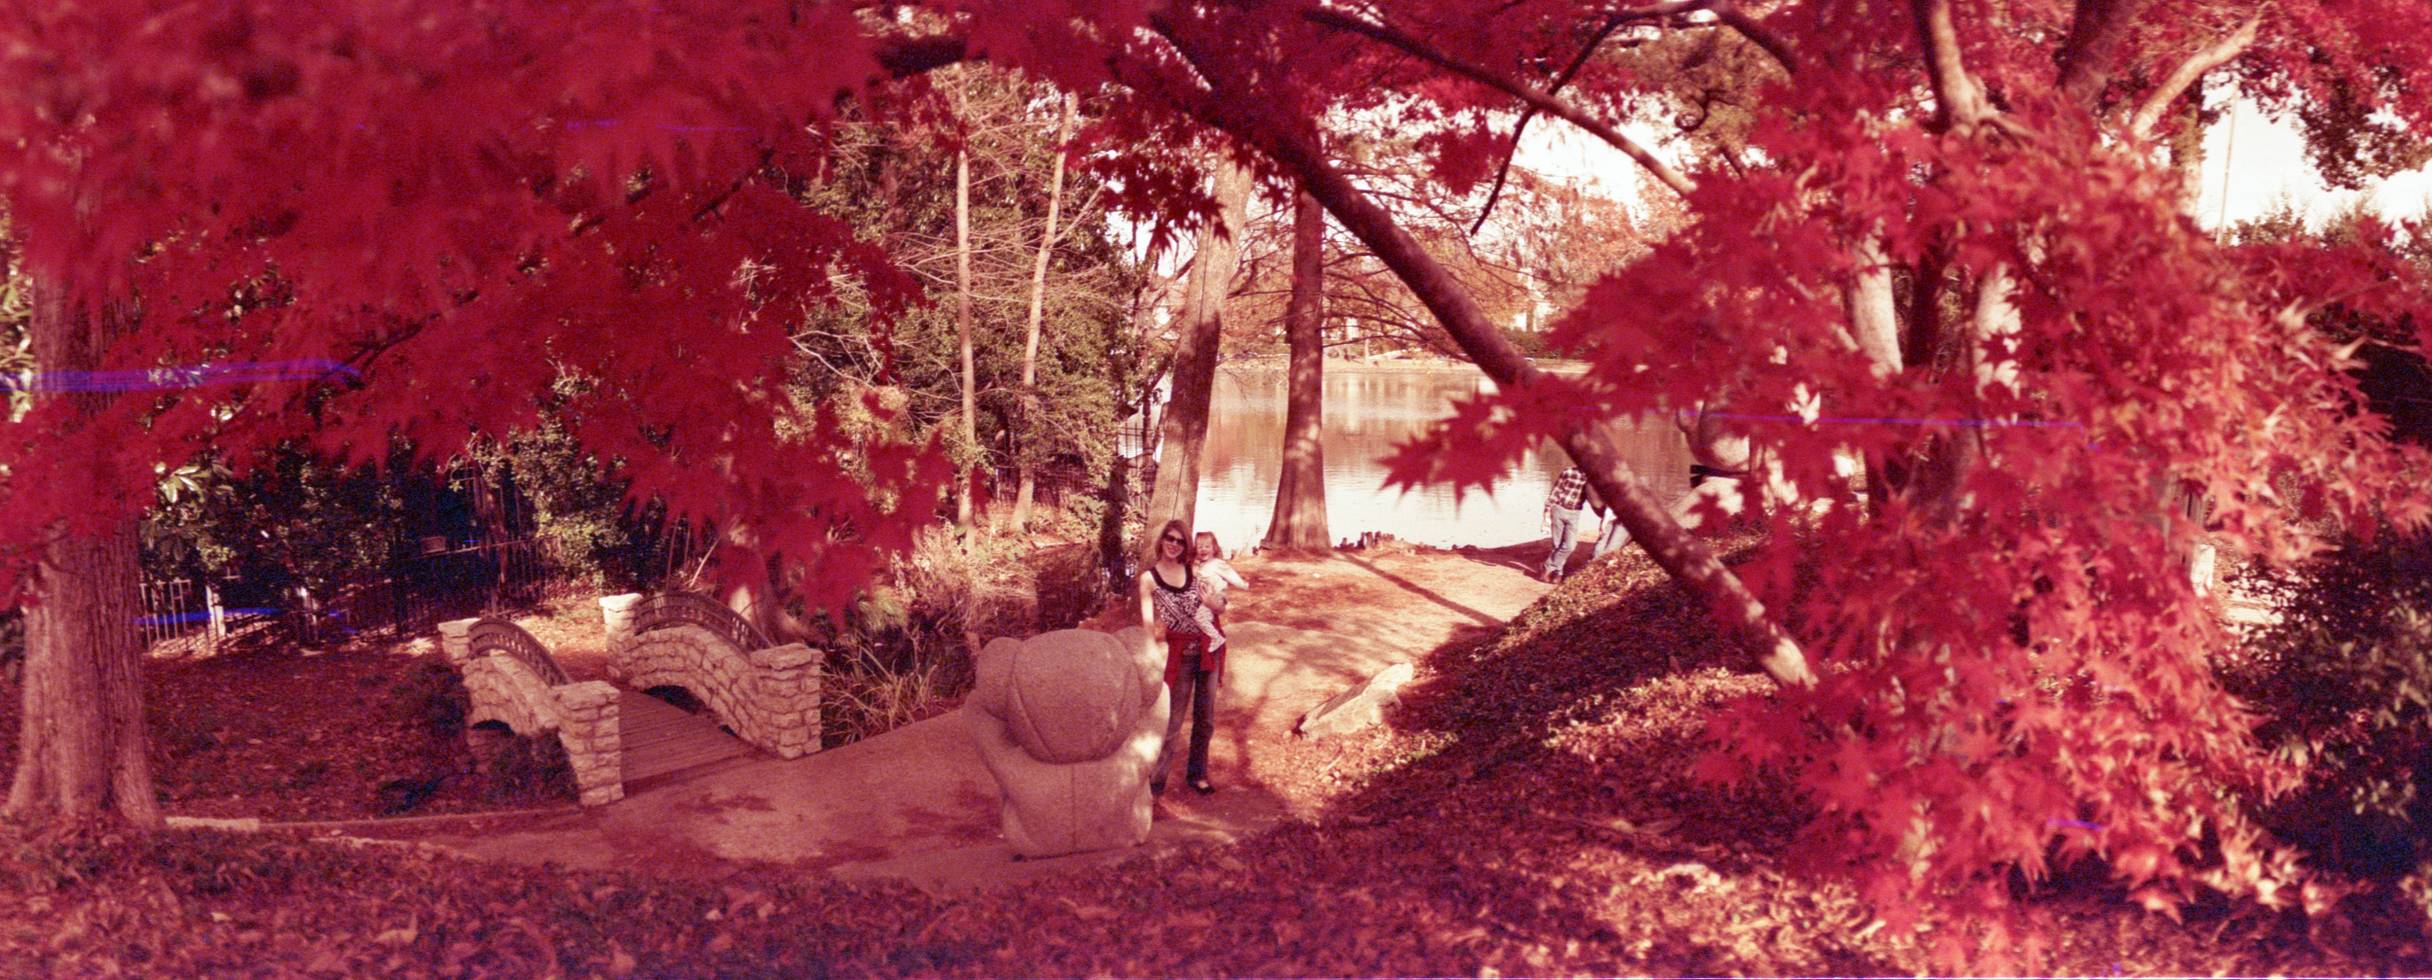
Would you rather tone it down? Then overexpose. A lot. Set that camera on ISO 25 or even 12.5 if you're able! This is my personal favorite way to shoot redscale. It gives everything a pale golden tone that works extremely well with warm light and skin tones. But I love having the option to crank up the effect (even within a single roll) just by altering my exposure.
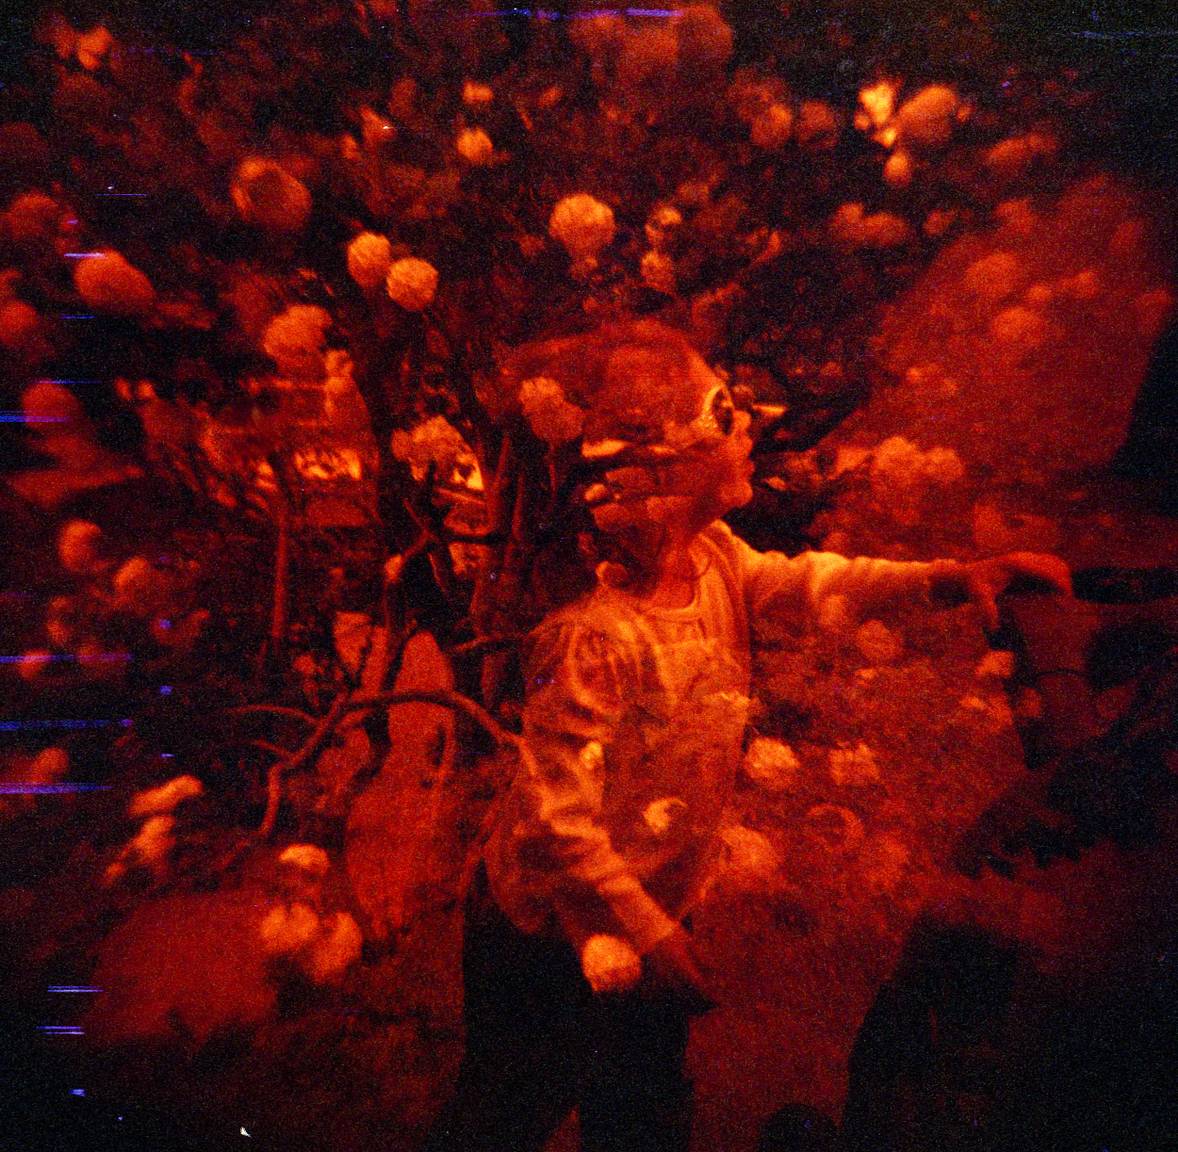
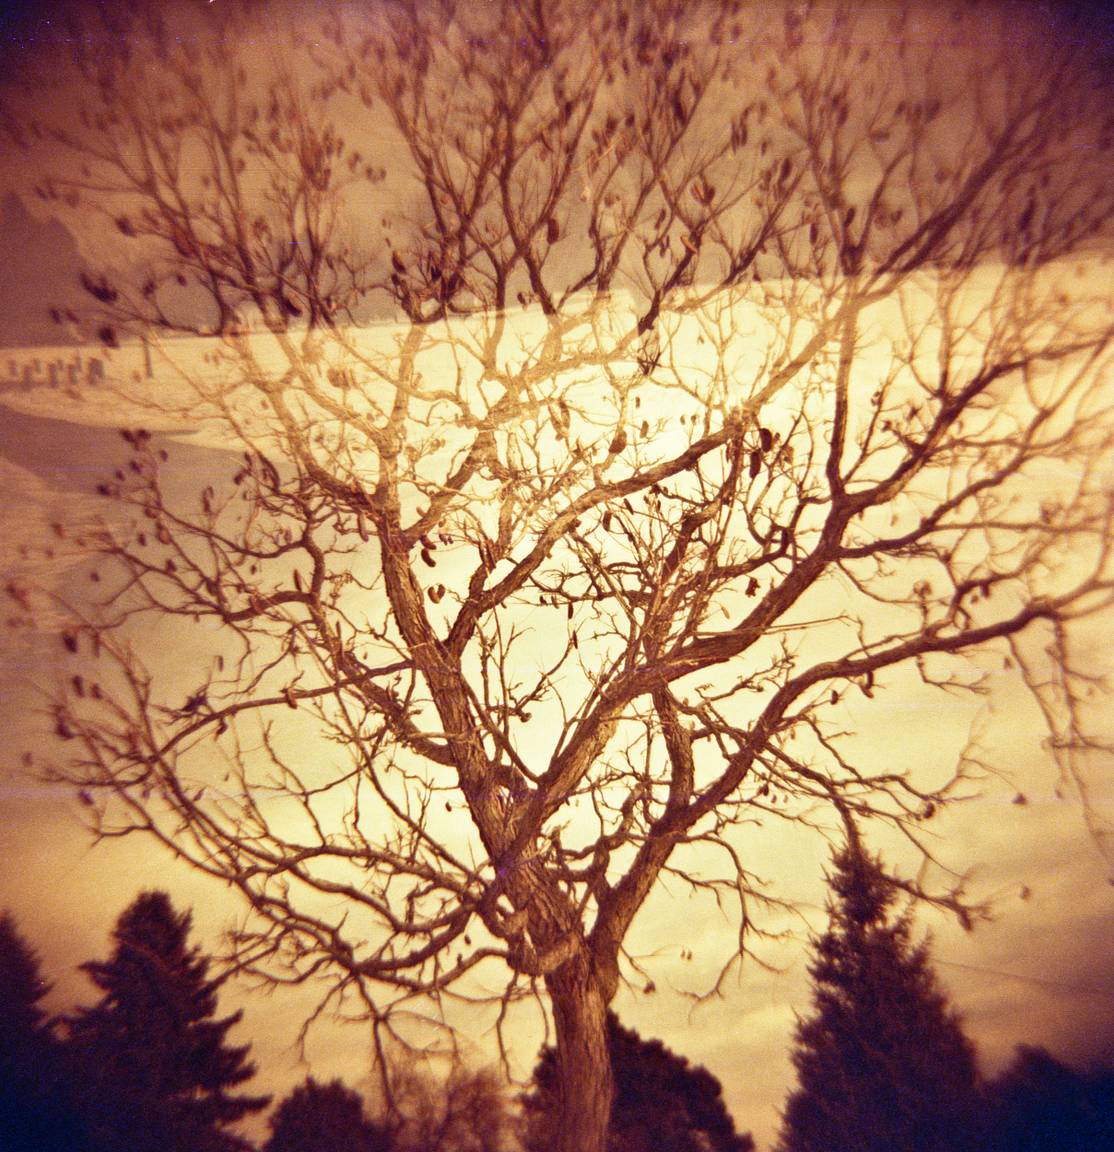
Credits: russheath

Tip #2: Superimpose

Redscale loves doubles. It seems nearly impossible to overexpose most redscale films, and because of this, there is enormous exposure latitude when shooting doubles. Try to keep each exposure in the frame at a similar ISO, however, or you may not be able to see both images as well as you would like.

Credits: russheath

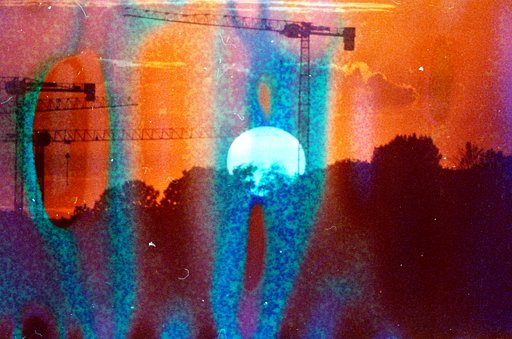
Tip #3: Beware the Blues!

Beware the blue lines. As you likely have noticed on several of these photos, the blue lines have a variable presence on many redscale films. I've heard several explanations for this, but the one that I think is correct is that the back side of the film is much more fragile, and is therefore scratched easily when it's facing the front of the camera. If you consider this a "feature," then feel free to ignore this tip and embrace the random blue lines. If you don't like it, then consider padding the edges of your film mask with something like soft tape to avoid some of the scratches.

Credits: russheath

That's all! Nothing new to you many Lomo redscale experts out there, but if you're just starting to play with this fun film, then I hope this helps you off to a good start. Cheers!

Credits: russheath

This tipster was written by Community member russheath. In need of a redscale film? Check out our Online Shop or visit the Gallery Store and check out our wide selection of emulsions for you to experiment with.

written by russheath on 2012-02-24 #gear #tutorials #film #redscale #tipster #lomo #lomography #overexpose #xr #redscale-xr #lattitude

18 Comments

  1. vicuna
    vicuna ·

    You're so right about the variety of tones a red scale can give! :) About the blue lines you can avoid them by scanning your picture with a big black border on one side. The scanner software will recognize the "true black", and generally will give deeper reds pics but no/less blue lines.

  2. bloomchen
    bloomchen ·

    nice article. i like redscale but i´m not an expert so this is helpful for me. thanks. i shot redscale with the sardina and was pretty satisfied with the results but didn´t have or chose an option on exposure time: www.lomography.com/homes/bloomchen/albums/1760454-beach-wor…
    the pictures i took with the seagull on redscale are satisfying, too but this offers me now possibilties i think.

  3. neanderthalis
    neanderthalis ·

    I like increasing exposure to get the lighter reds. Another tip is to use a green filter when shooting landscapes with redscale. It can make plants pop and some green to come through the redscale.

  4. ginny
    ginny ·

    Amazing pictures!

  5. lighthouseblues
    lighthouseblues ·

    Interesting article!
    I'm fairly new here, and I instantly fell for this film. The first times it felt like taming a wildhorse though... ;-) Now I have realized that it is also a matter of scanning skills, and with the DigitaLiza it is a piece of cake! Just be sure to not mark the outer borders first, just mark an inner piece of the picture, correct the colours, then mark the total area of your choise, and scan! I have just got my DigitaLiza, and have not had the time yet to upload something with my new experience, but it is on its way!

  6. russheath
    russheath ·

    @vicuna -- thanks for the tip, I'll definitely try that!
    @bloomchen -- great album! You may not think you can control the exposure precisely with La Sardina, but it looks like you had a nice range of exposures in that set. One of the thing I do with my Sprocket Rocket is to shoot on "Cloudy" even when it's bright outside. This is the equivalent of overexposing by a stop or so. I think the same should be possible with La Sardina . . . ?
    @neanderthalis -- cool! I'll try the green filter, thanks!
    @ginny -- thank you!
    @lighthouseblues -- thanks! Agreed, scanning is a whole other skill, separate from shooting photos but just as important these days. :D

  7. northwardnimbus
    northwardnimbus ·

    great tips!

  8. tallgrrlrocks
    tallgrrlrocks ·

    Totally informative article! I've always shied away from this film type, I hope to shoot more redscales this year.

  9. ikia2034
    ikia2034 ·

    Thanks for the tips. I'm new to lomography so all the helpful hints really help. :D

  10. russheath
    russheath ·

    @northwardnimbus -- thanks!
    @tallgrrlrocks -- I'm sure you'll love it!
    @ikia2034 -- :D Redscale is a great film to try when you're new to Lomo, because the wide exposure latitude is really forgiving.

  11. imatimetraveler
    imatimetraveler ·

    Amazing photos! I've shot a couple of redscale films with my LC-A+ but all of them came out really dark and grainy. Any suggestions for improvement? I would very much appreciate!

  12. 43puestasdesol
    43puestasdesol ·

    Wow, this article is so useful! I've recently purchased my first redscale bundle and I'm a bit lost. I will definitely take your tips into account!
    I'm going to try and translate this article to Spanish, so it can help more people! Thank you!

  13. dianalerias
    dianalerias ·

    thanks for this! i love redscle film but sometimes i struggle with it a little to get the results i want.

  14. russheath
    russheath ·

    @imatimetraveler -- My guess would be that you are underexposing the film. Redscale LOVES to be overexposed, it tolerates underexposure less well. Try setting your ISO to 100 (or lower on a camera that will let you)!

    @43puestasdesol -- Thanks so much, and best of luck with the new film!!

    @Robert H. Bruce -- Thank you! I hope you find some redscale . . . but if they don't, it is always possible to do it yourself. Just turn any "bog standard" film around in a darkroom (lots of good tutorials online).

    @dianalerias -- :D I hope it helps.

  15. dianalerias
    dianalerias ·

    yep, it does! :)

  16. hannahugm
    hannahugm ·

    Hey,
    Thanks for the article- really helpful! I'm hoping to try out some redscale when the weather gets a little brighter. I was wondering, is there anything you need to tell the developer about processing when you take in film that you have redscaled?
    Cheers!

  17. russheath
    russheath ·

    @hannahugm -- Thank you! Nothing special to tell the lab, just tell them to process it normally in C-41 chemicals. If you've redscaled yourself, then you may want to warn them if you use the method that introduces a small piece of tape into the roll, as that might gum up some machines if they aren't expecting it. If you're shooting one of the pre-packaged redscales like Lomo's then just drop it off and enjoy!

  18. hannahugm
    hannahugm ·

    Thanks!

More Interesting Articles